
If you’re at all like me, you are in front of a computer for most of your waking and conscious day. Everyone has their own personal preference for computer workstations, and these days I use an 11″ Macbook Air for all of my personal and professional needs. I like its small size and portability combined with its decent operating muscle (I’m a graphic designer so I use industry-standard Adobe design software… Photoshop, Illustrator, etc.) When I’m at my desk I have my Macbook plugged into a 23″ monitor, but when I want to hit the road and, say, go work at a coffee shop or take a project to a client I simply unplug and go. My entire office fits into a small backpack, and that’s awesome.
The only downside to this is that everything runs off of a lithium-ion battery. Even when plugged into the wall, power is running through the battery and, even if you are very careful to maintain your battery (running charge cycles at least once a month, keeping it within operating temperatures, etc.) it will eventually succumb to the law of entropy and, one day, die.
This happened to me this month. Last week, in fact. My computer was running terribly sluggishly, even connected to the MagSafe cable, and the battery indicator on my toolbar was saying “replace now.” Reading online I found that Macbook Airs aren’t “supposed” to have their batteries replaced by the consumer and you have to take it to the Apple store to have them do it… but you can do it yourself if you are even somewhat familiar with fixing electronics. While I’m no electronics guru I have fixed a few gadgets before so I figured I’d give it a shot, and since here I am writing this with a brand-new battery installed, I guess I did a pretty good job. Here’s how it’s done, if you want to try it yourself:
1. First I went to iFixIt.com to find the correct battery for my Macbook Air. Mine was the Mid-2011. (Click the Apple in the upper left corner and select “About This Mac” and then hit “More Info.” It will tell you the make of your laptop.)
2. You’ll also need to get a T5 Torx screwdriver, which has a 6-pointed star head. The screws you remove all use this. If you don’t have one, they’re about $6.
(If you have a protective cover on your Mac, like I do, you’ll have to remove that. You only need to get to the bottom of your laptop so no need to remove a separate top lid cover if you have one of those too.)

3. Turn your Macbook over, hinge side pointing away from you. On the underside of your Macbook, there are 10 screws. Remove them all, making sure you know where they are supposed to go back to because some are different lengths. I made a chart on a piece of paper and put each onto it based on their placement.
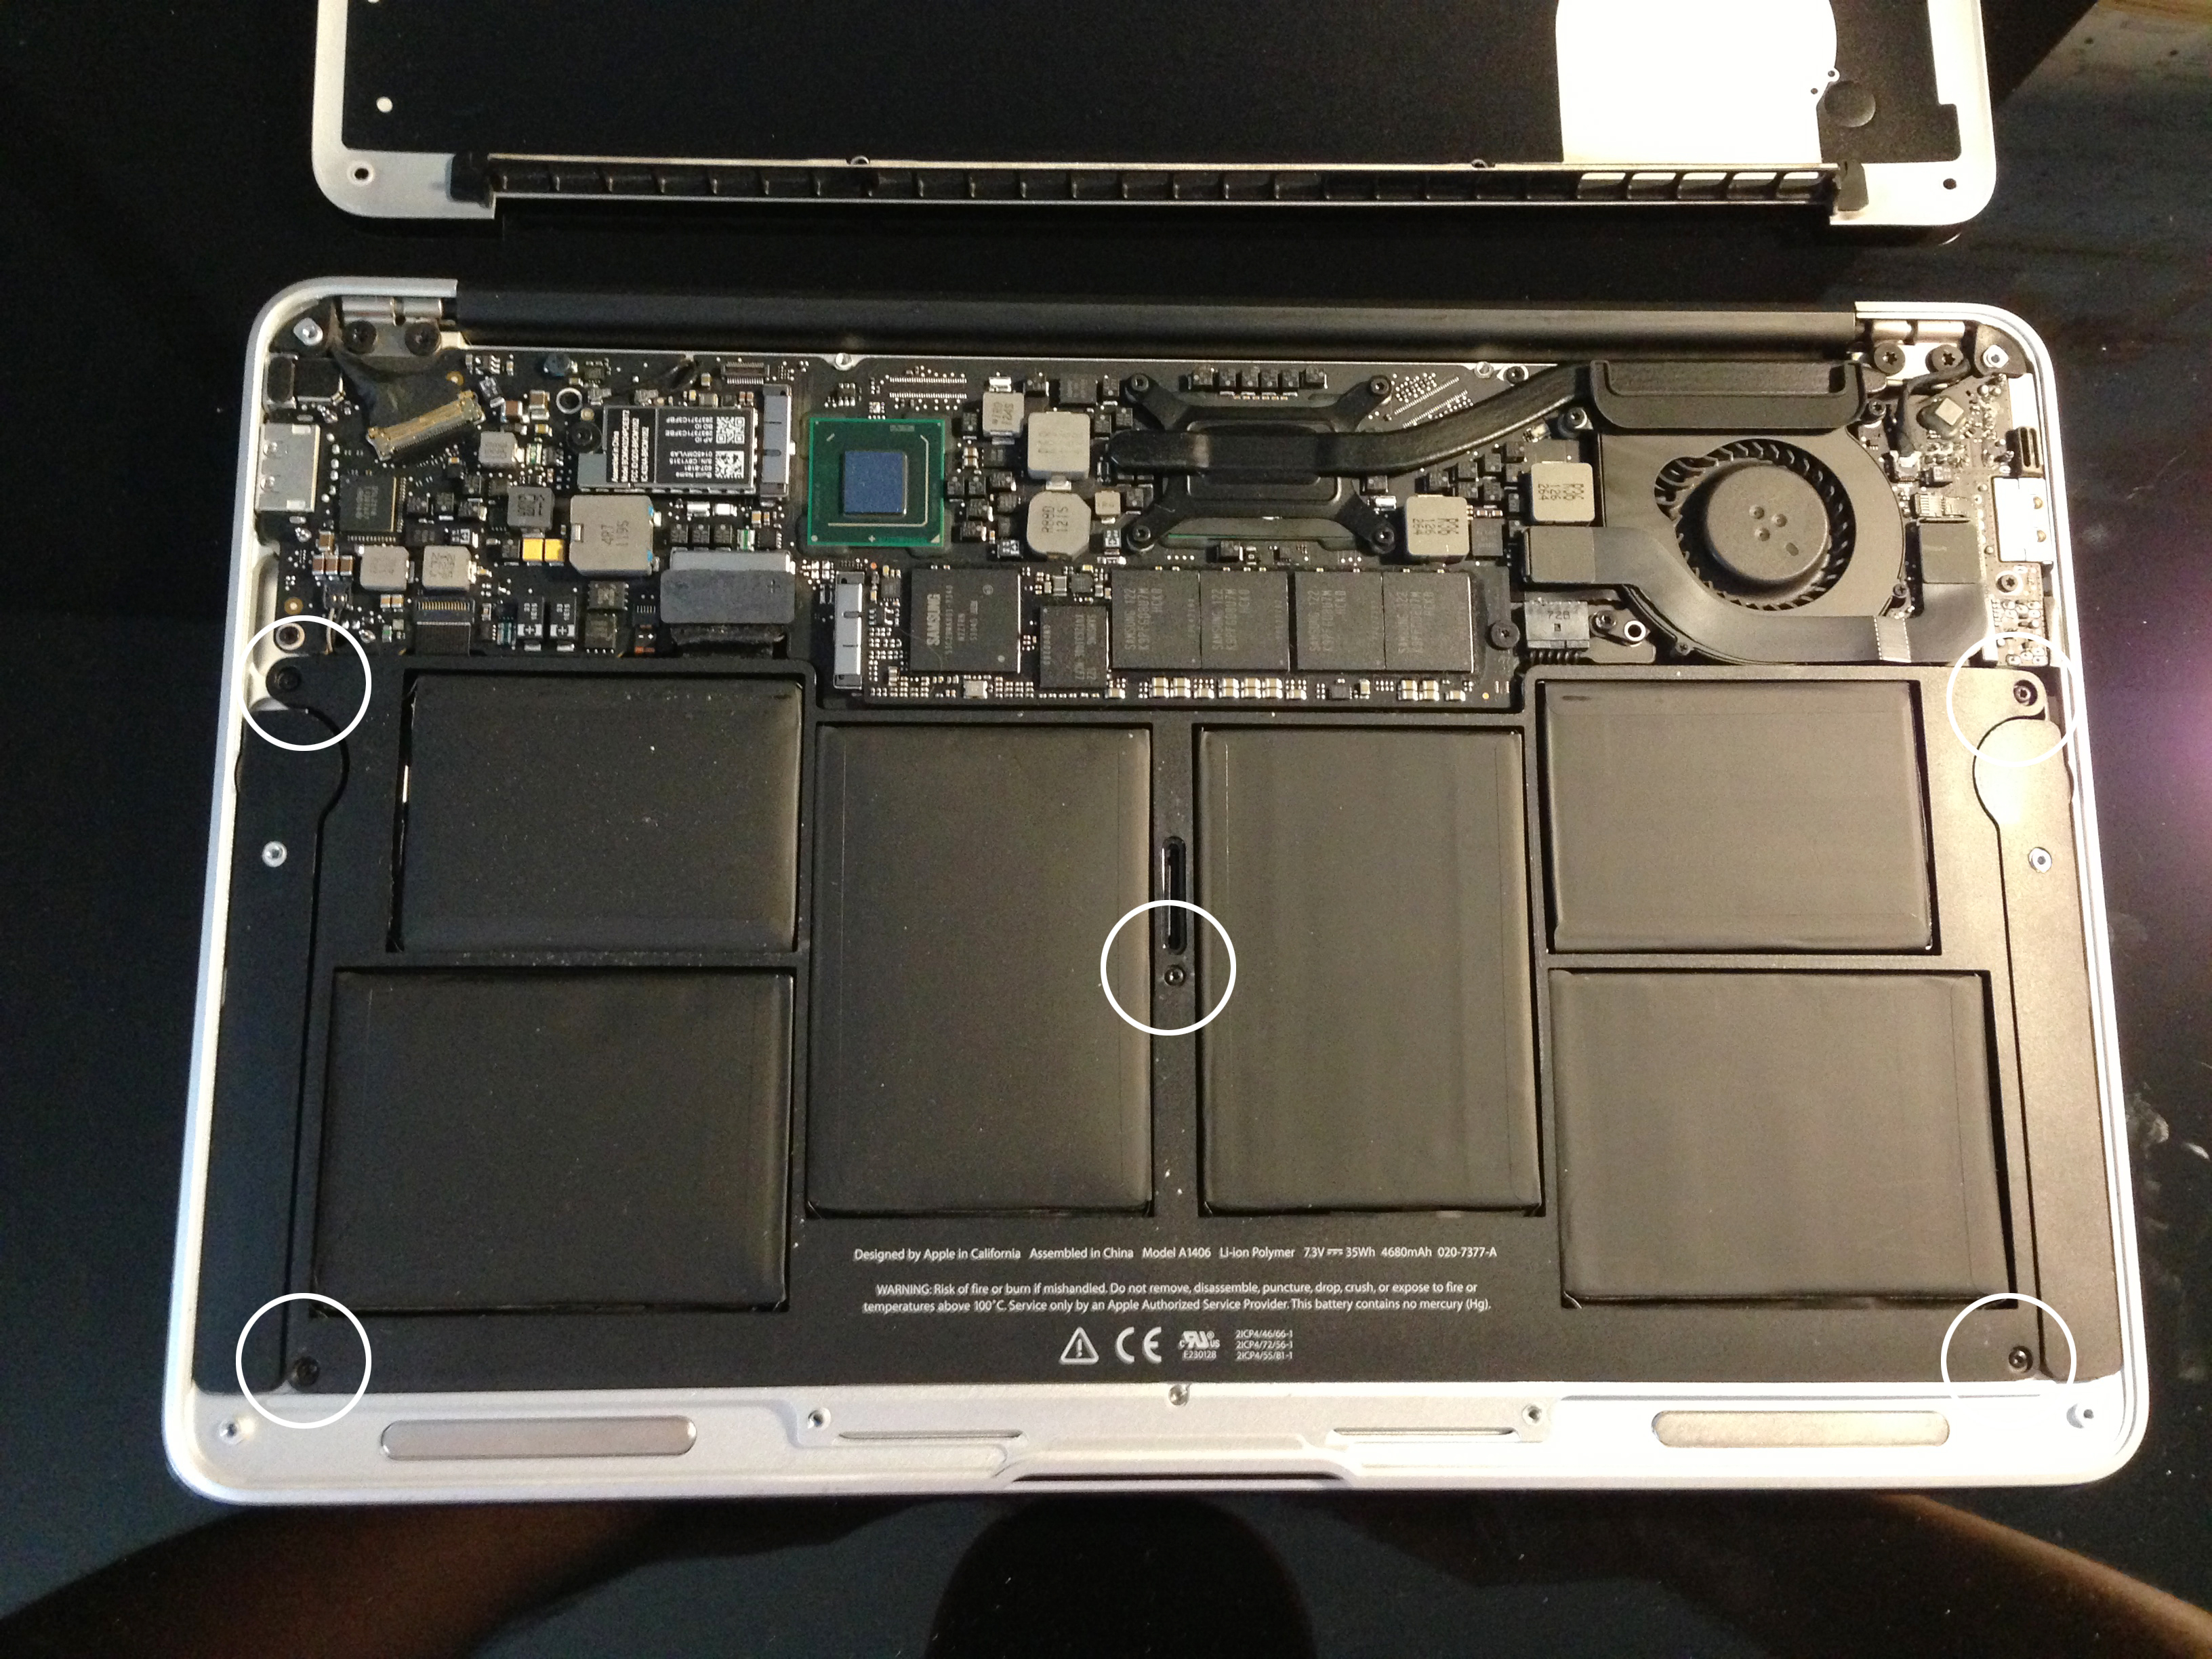
4. Remove the back cover, pulling the part near the hinges up first.
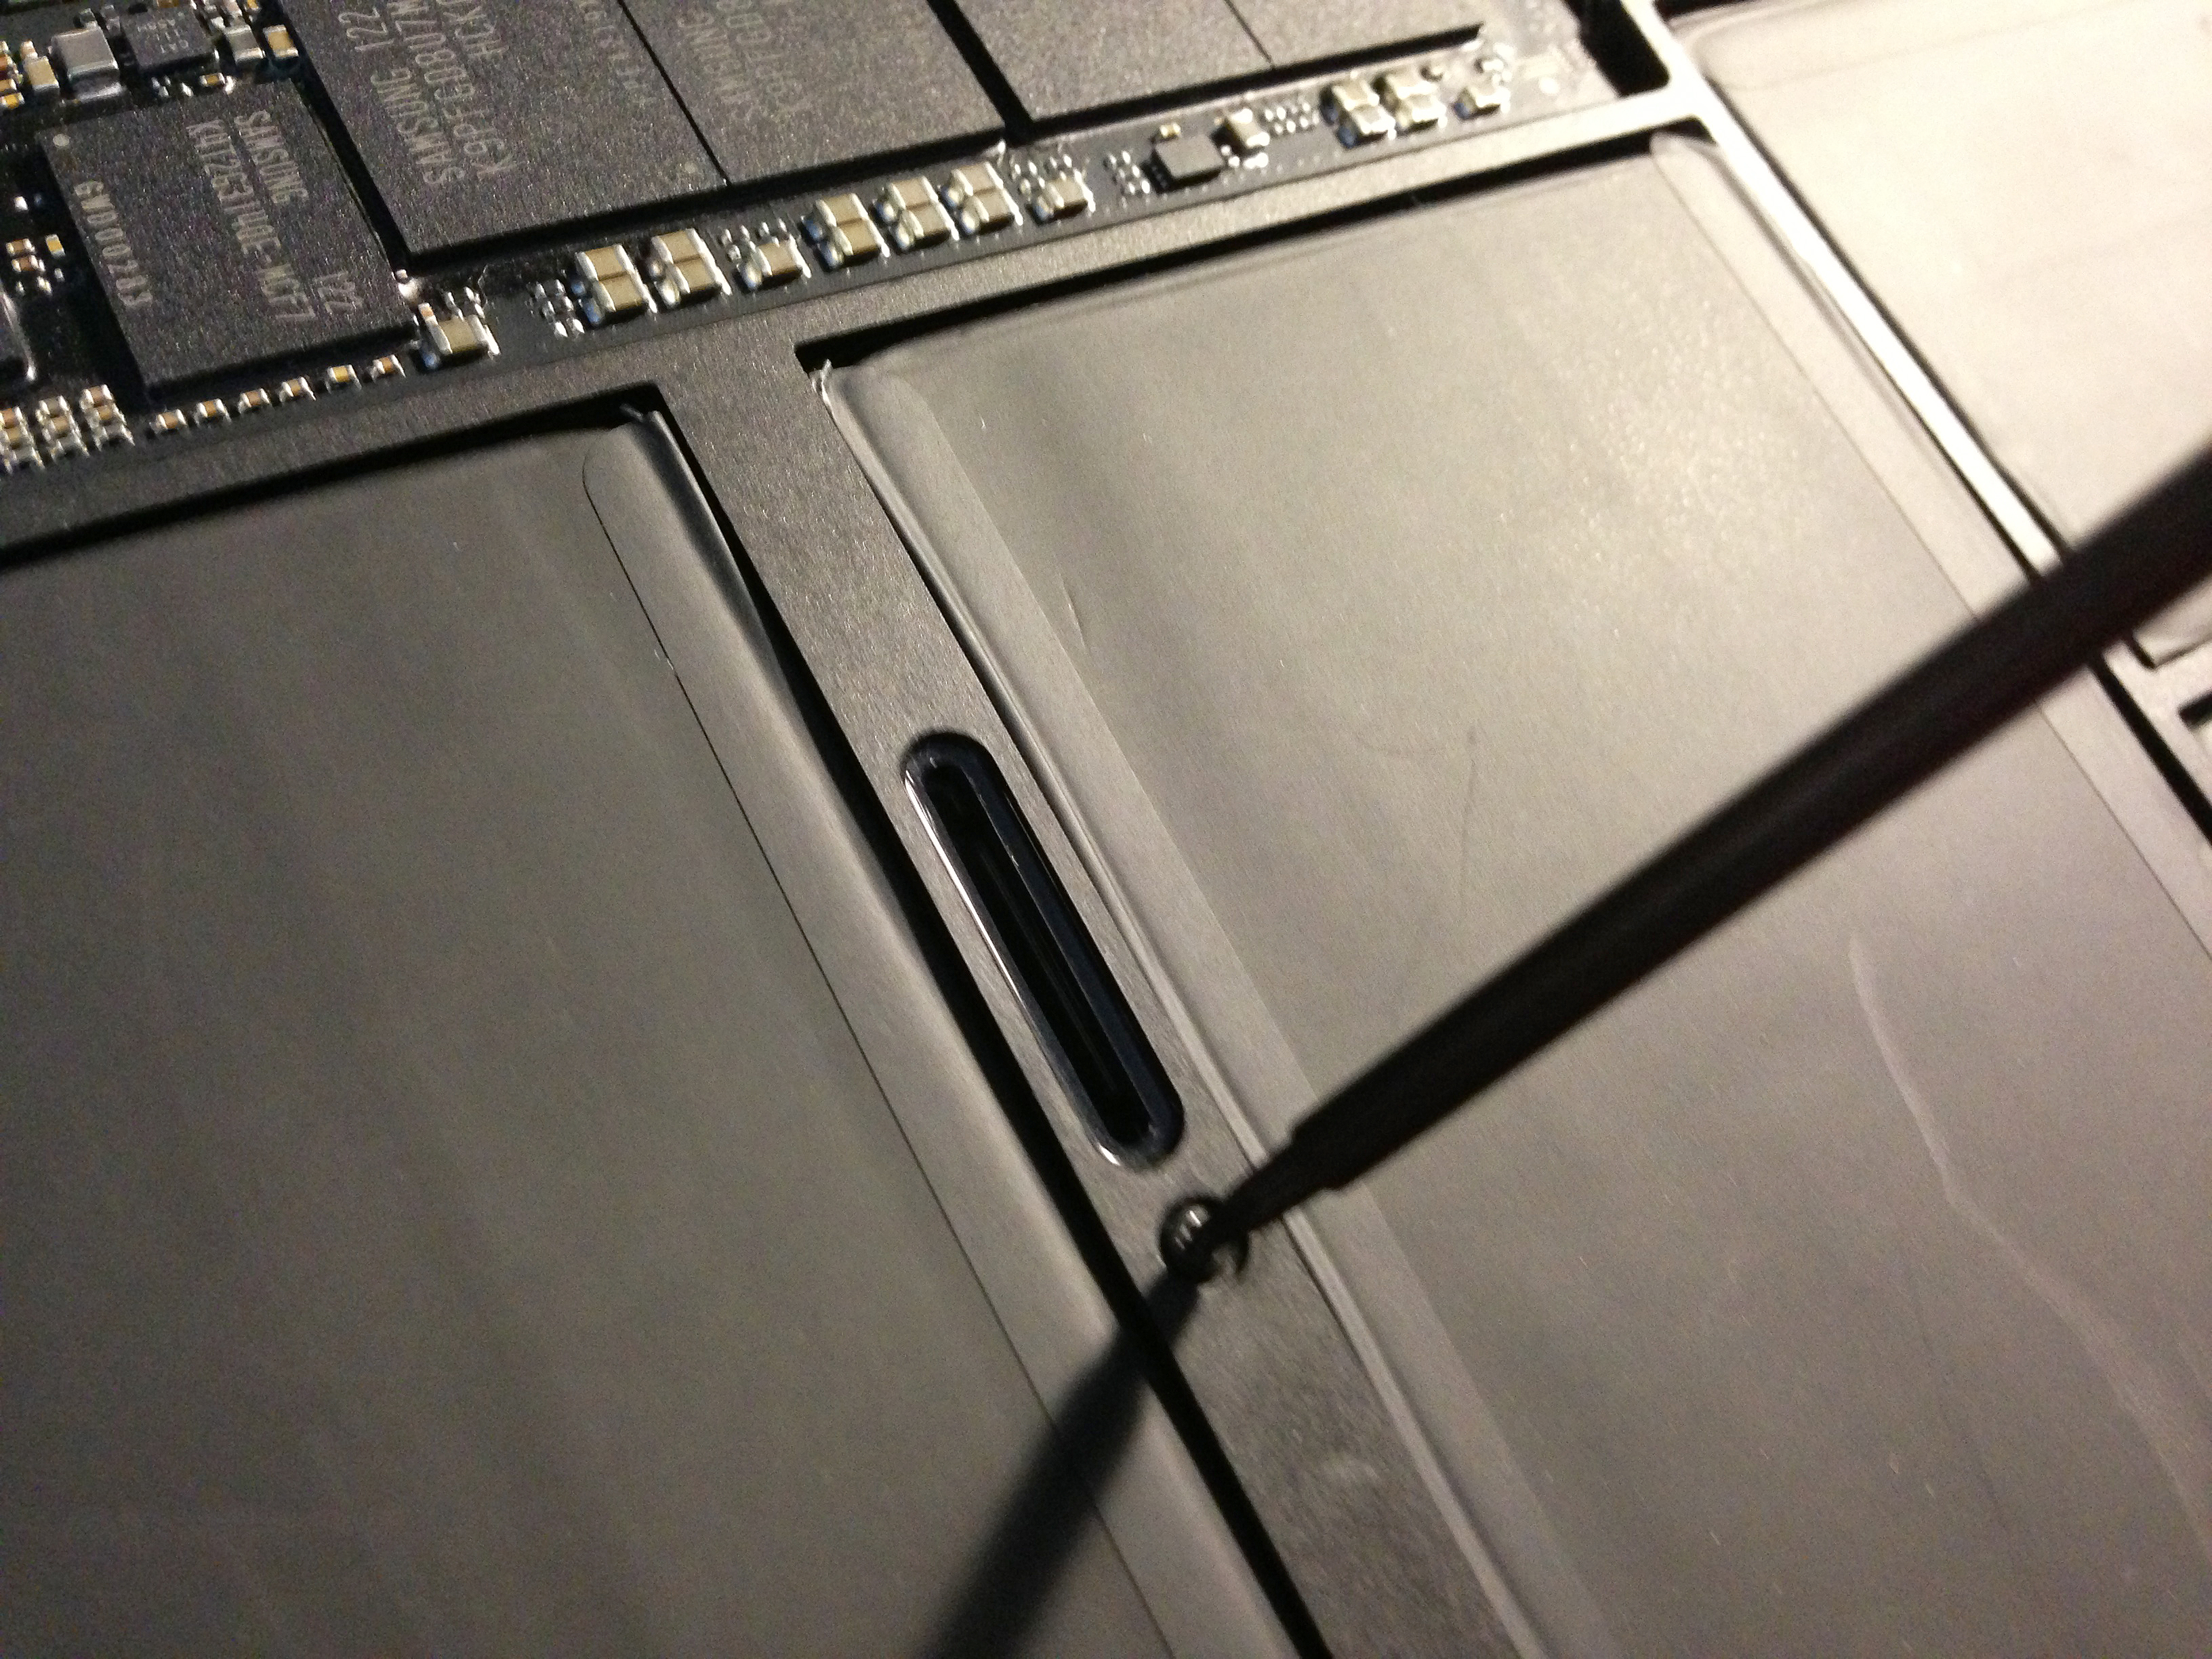
5. You can’t miss the battery — it’s the huge black thing. Carefully pull up on the small black tab with the “+ and -” on it, and then unscrew the 5 screws on the battery. (Based on your model there might be more.) Don’t forget the center one. (No need to unscrew the two black brackets on either side.)
NOTE: I took this opportunity to clean out the insides a bit, using a compressed air canister and microfiber cloth. The fan was packed with dust, and I found no less than three cat whiskers in there. That can’t help performance any!

6. Take the battery out, and place the new one in.
7. Reconnect the “+ -” tab by pressing down on it, and put the screws back where they were on the old battery. Mine didn’t tighten all the way — it’s so compact in there once the back’s on I figured this wouldn’t matter much.

8. Replace the back panel, angling the side nearest you in first and then the side near the hinge. Put the screws back in the same places they were in.
9. That’s it — just turn your Mac on and all should be good. The battery will have a charge to it but not a full one, it’s advised to plug it in and charge it to 100% before unplugging it again. If you do leave it plugged in a lot (like I do) it’s good practice to let it drain down at least once a month. And if you store it unplugged for a considerable length of time leave it at 50% or so. This will help it live longer, so you won’t have to look at the inside of your laptop again for a while!
So far my CPU performance is back to normal — no lags or slowdowns. I guess running power through a bad battery is like running a race with rocks in your shoes. Hopefully this will help someone else out there who might be experiencing the same issues. It really wasn’t difficult so if you can handle small screws and seeing electronic innards, you should have no problem.
Now… back to SPACE!!!
(Thanks to iFixIt.com for the parts.)
*Note: the old battery should be disposed of properly. Contact your local recycling service to find out how best to do this.

And like this, your MacBook Air found a second youth 😉
But, like you said it, back to Space !!
Jeff Barani from Vence (France)
LikeLike
How long did your original battery last? I just bought my MacBook Air 11″ (also for the compact, light, and easy portable reason) this month and curious as to the life of the battery. Finding this I will change it myself after my warranty is over rather than pay someone else to do it. TY
LikeLike
It’s a mid-2011, so it lasted all this time. But I don’t maintain it well, and I keep it plugged in for long periods without letting it drain completely. So 2 years then, with minimal care.
LikeLike
Thank you. And I would have thought there was no need to drain the battery completely; i.e. it wouldn’t be an Nmh battery in this thing.
LikeLike
It let me change battery easily. Thank for your guide
http://batterychargersexpert.com
LikeLike